
Roll with the Down Low Glow this fall.

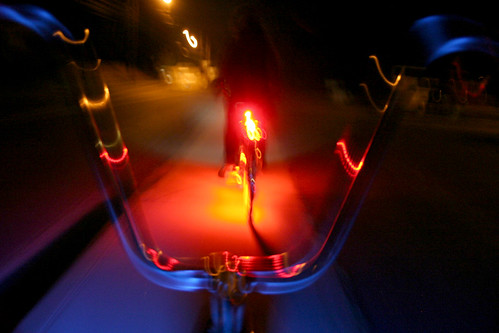
Photo: Joey Mac
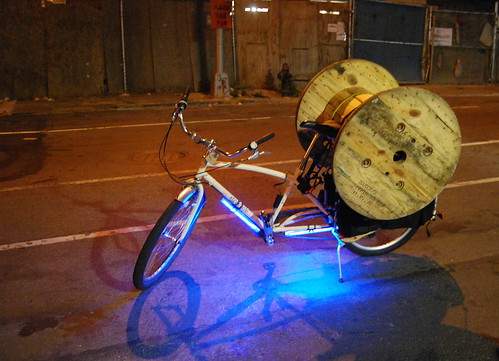
Stay safe and have a little fun this fall with a bike light as phenomenal as you are. Pictured above is a dual-tube Down Low Glow system, paired with a rear blinky. We now offer a discount on our rear blinkie when you purchase a Down Low Glow. Just look for the “Add a blinkie” option at checkout.
Here are 16 more reasons to roll with the Down Low Glow this fall.
Biking Rules PSA competition, deadline Sept 28
I stumbled across this NYC-based competition to promote bike culture! $4,000/new Kona top prizes. RTB DLG or other video could work perfectly…
copied from http://bikingrules.org/PSA:
What is a Biking Rules PSA?
A Biking Rules PSA, or public service announcement, is a media message, moving or still, that will help promote bicycling and improve the public image of cyclists.
What kind of media qualifies as a PSA?
Still Images: including photography, poster art, graphic design, illustrations…
Videos: including narratives, documentaries, animations, and any other moving image. Entrants can submit both Do-It-Yourself Videos made with cell phones or consumer grade cameras or High-Definition Videos made with professional HD or HDV Cameras (see our Discount rental offer with DCTV!)
All Images and Videos must fit into one of two categories
1. Biking Rules Street Code
2. Why Biking Rules
How do you submit images or videos?
Online from this site! All images and videos must be submitted by September 28th to be considered for the prizes and the Biking Rules PSA Festival.
Who can submit?
ANYONE! The Biking Rules PSA Competition is open to media makers worldwide. Winning Submissions will be selected by a jury and screened at the Biking Rules Film Festival in New York City in November 2009.
Why submit?
You will be in the running for great prizes, including up to $4,000 and a new Kona bike. Submission is FREE and all entrants will receive a Cycling Commuter kit!*
Read MoreClimbing up El Arbol for the first ride

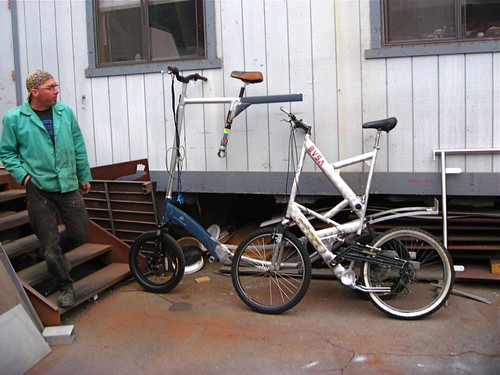
My dad’s been suggesting that I test ride El Arbol as soon as possible before sinking the hours into custom fiberglass work on the trunk, roots and branches. Not a bad idea. OK, so it didn’t have brakes or pedals, but at least now the frame has at lease now been heat treated.
The ride was great. Tall bike people know that a tall object can actually be easier to balance. The classic example: try balancing a ruler in your palm, then try a yard stick. As you can see in the photo below, El Arbol is about a foot taller than Jay’s tall bike, part of his BayView Space Agency fleet. This makes it easier to balance at slow speeds.
On my first coast, I mounted using the hood of a pickup truck and had Ydran and Adam give a running push in the slightly downhill direction on Channing. The ride is solid. No noticeable frame flex, and that’s before the added stiffness of the fiberglass trunk and branch. The balance was easy, even at slow speeds. I only one little adrenaline jolt on the whole test ride, when I took a roundabout and experienced rapid decellaration. By the end I was doing my own running starts and dismounts in both the uphill and downhill directions. It was Adam’s idea to jam some pipe in the captain’s bottom bracket. That was hope stepped up and down onto the frame, as you can see above.
I had been a bit concerned that the small wheels that originally came with the A2B would make the ride twitchy or sluggish, but it was neither. The traction was great, ans slow speed manuevers felt smooth.
I knew that Jay was leaving for his honeymoon yesterday, and that Tuesday would be our last work session. We welded in the cable management for the root-deployment system. I’ll post more photos soon.
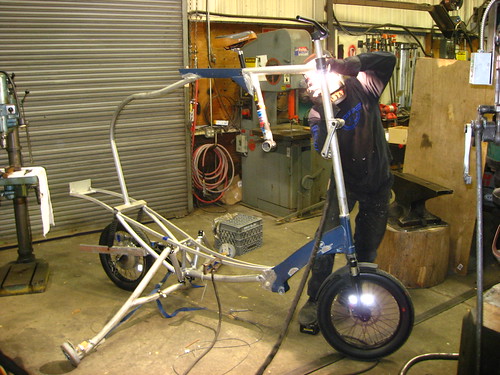
On Wednesday I borrowed a truck to get the frame over to Garner Heat Treating in Oakand. The guys were totally pro and enthusiastic about the project.
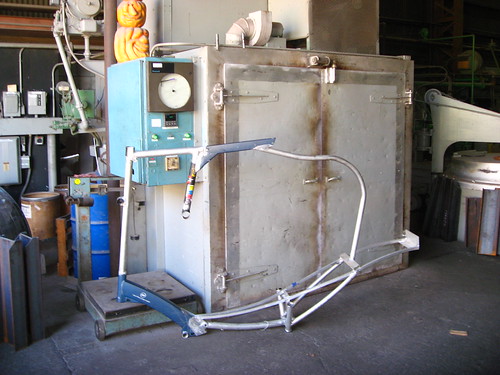
Apparently there are two ways to restore strength to an aluminum frame after it’s been welded. The more involved one heats the frame to within 30 degrees of liquid, which leaves the frame soft and succeptible to bending under its own weight. Typically at this point bike builders put the frame back in a jig to check alignment. Because El Arbol is a giant frame and a one off, there’s no jig. So we chose the other method, which brings up the frame only to about 300-400 degrees. This method stress relieves the welds but not to the full ‘T6’ strength of the aluminum. With the average wall thickness of El Arbol’s frame being much greater than that of say a Cannondale, I’m not too worried about the strength being compromised.
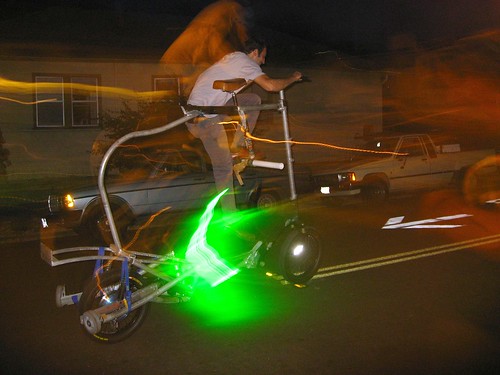
After bringing the frame back to Rock The Bike, I waited till about 6 last night before ditching the computer and throwing parts back on it. We tied the roots against the frame, since the deployment system isn’t ready yet, and I through an Envy Green Down Low Glow on the bottom tube. Lots of props from the neighborhood, a good omen!
Welcome, young Jedi

This is what happens when people get the passion for a new way of transportation. A way that challenges you and inspires others. This is what happens when you really want a bar table.
Photo:Band Of Bicycles
Rides and Events: Band Of Bicycles
Service Bulletin for Down Low Glow systems sold in late 2008, early ’09.

Down Low Glow systems made by Rock the Bike in October 2008 through January 2009 may have a flaw that can cause premature wear and, in the worst case scenario, a battery short circuit.
How do I know if my DLG unit has the problem?
There are two related but distinct problems. Either of them is grounds for partipicating in the recall. If your DLG system has either of these problems, we’d prefer to fix it and return it to you. You’ll be more likely to enjoy using it for its entire working life.
Problem 1: Stiff power connector.
Test: It requires more than a casual push / pull to plug and unplug your Down Low Glow battery.
Effect: The stiff power connector makes it more likely that you’ll yank the wire that leads to the battery.
Solutions:
- Send your light tubes back and let us fix it. See instructions at the bottom of the page.
- Change your technique: Use a twisting technique as you undo the power connector, rather than a direct pull.
- Use a drop of lube. Boeshield, TriFlow, even chain lube can make this connector feel significantly easier to do and undo.
- Do the fix yourself: Expand the inner bore of the male power connector. You can do this at home if you have an index of numbered drill bits. Use the non-drilling side of the bit: First #39, then #38. Insert the male connector (the one on the light tubes) as far as it will go. The connector should now have a much easier push / pull force.
- Upgrade to the waterproof pushbutton switch for $18. Shown below, the waterproof pushbutton switch allows you to turn the Down Low Glow on and off without physically disconnecting the power connector. This is faster, can be done with one hand, and puts less strain on the connector.

Waterproof DLG Switch
Problem 2: Lack of proper strain relief on the power cable exiting the battery pack.
 Example of strain relief damage on Down Low Glow battery’s output wire.

Examples of batteries before, during, and after the affected period.
This problem was excacerbated when our manufacturer switched from a flexible waterproofing adhesive to a harder, more brittle adhesive.
Test: Your battery may have a bead of sealant around the top and the bottom that is bluish / purplish in color and slightly filmy in its translucency, as shown in the picture. In the photo above, the battery with the rubberband is the one that has this adhesive. Note that the battery on the left has a less bulky sealing adhesive that appears black. We have seen fewer failures on batteries that use the flexible adhesive. The battery on the right has had our fix applied — a piece of flexible tubing that adds strain relief where the power cable leaves the battery.
Effect: Over time, and especially in cold weather, the adhesive can kink and damage the wire. The black insulation can fail, exposing the inner wires, which have their own insulation. In the worst case, the insulation of the inner wires can fail as well, exposing the copper conductors.
Action:
Examine your battery to see if wire damage has already occurred at the point where the wire exits the battery. If so, you would see the black wire jacket either crumbling or split, and you may see the white and red insulation of the inner wires. If you are able to see any bare copper wire when you inspect this area, you must take extra care when packing the battery for shipment to eliminate the chance of a short circuit in transit. If you are concerned it may be a shipping hazard, please let us know, so that we can provide alternate instructions.
If it’s starting to show damage, get it fixed.
- Send it back. Skip to the bottom and follow the instructions to participate in the recall.
- Do the fix yourself. We use a short piece (about 1 inch long) of flexible 1/4″ vinyl tubing to strain relief the wire as it exits the battery. Cut a slit the tubing, turning it into a sleeve that you can slide down the wire. Heat up the area with a hair dryer or heat gun. Push the tubing down past the glue line — half in and half out. Reseal the are with a flexible adhesive such as Plumber’s Goop.
If your battery is showing minimal damage or none at all, please take the following preventative action now to reduce yanks on the output wire:

1. Pinch output wire as shown to prepare for taping step.

2. Wrap tape over one side of the loop.
 3. Wrap tape over the other side of the loop. The tape prevents yanks and tugs from creating strain on the wire where it exits the battery pack.
 The mod shortens the battery’s output wire a bit.
OK, I have decided to let you fix my Down Low Glow. What should I do now?
If your Down Low Glow system has either of these issues above, please use the contact page and select “Winter 2008-09 Down Low Glow Recall” as the topic. Please indicate what you will be returning. For example:
“Hi Rock the Bike,
I would like to participate in the recall. I checked and my battery has the adhesive shown on the recall page. Also, my power connector is too stiff. I will be returning my light tubes and battery.
Thanks,
Rob”
Read More